www.stereoview.org/
www.stereoscopic.org
for a selection of info, photos and links.
There are basically three ways to obtain stereo image pairs:
- Use one camera
- Use a stereo adapter
- Use two cameras
- Anaglyph
- parallel vision
- crossed-eye vision
graphicssoft.about.com/library/weekly/aa082499.htm
Both the parallel and crossed-view technique work by focussing your eyes behind the screen/paper. At some point, the two seperate images start to move onto each other and form a 3D image. I personally find it very difficult. There are plastic glasses that help you in reaching the correct "misfocus", but I haven't tried these.
Stereo Photography with one camera
Everyone can try this, all you need is one camera. You take one shot of the scene, then move the camera about 6.5cm to the side and take another shot. 6.5cm because this is the average distance of human eyes. Be careful to move the camera horizontally and not to tilt or turn it. For best results, you should keep exposure and focus the same between the two pictures.
Stereo Photography with an adapter
A stereo adapter (or "3D adapter") works either with prisms or mirrors. The two entry pupils of the adapter are roughly 6.5cm apart and the prisms/mirrors reflect the two images side-by-side onto the CCD or film.
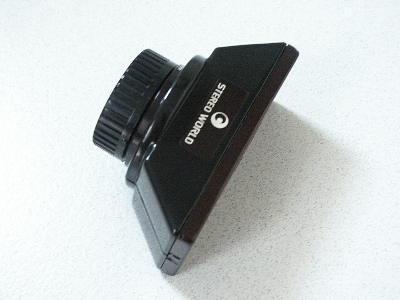
The StereoWorld adapter
One problem is that the resulting pictures are always in portrait orientation and the range of focal lengths that work with the adapter is usually very limited. Also, auto-exposure and autofocus can be problem with this set-up. The biggest plus is that the two pictures are taken at exactly the same time. If you want to capture high speed action in stereo images, this is probably the best way to do it.

My Olympus 2020 with the StereoWorld adapter.
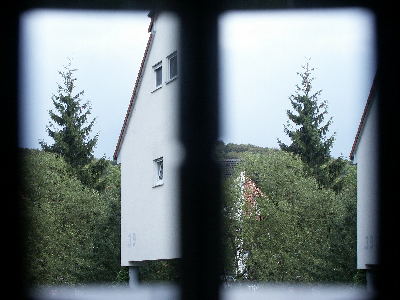

This was shot with my D7 and StereoWorld adapter. The two sections were seperated and overlaid in PaintShopPro, greyscaled and tinted.
This is for those of you preferring parallel vision:
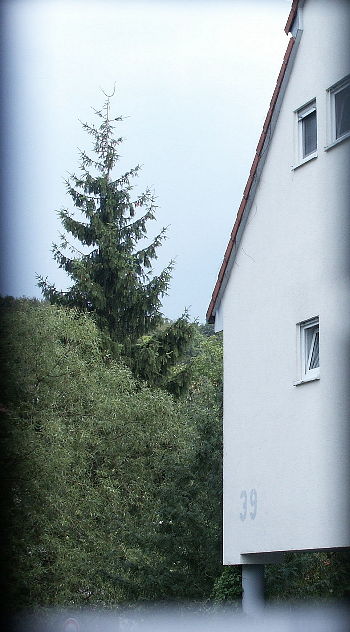
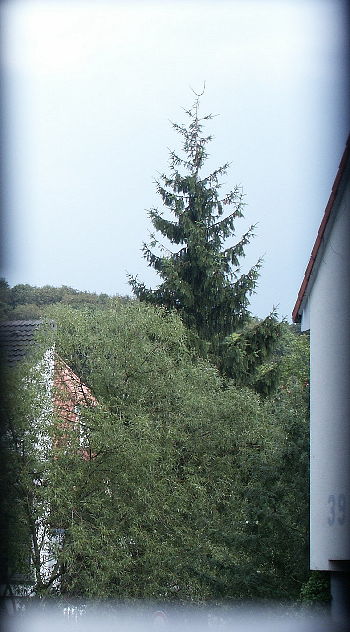
And this is for those of you preferring crossed-eye vision:
Stereo Photography with two cameras
Using two cameras to capture stereo images is a very effective way. However, there are some drawbacks. First, you have to have two cameras and pay for them... Then you'll need a way to synchronize the two cameras. With truely manual cameras this is fairly easy, a parallel remote release can be built fairly well. With electronic cameras, both film and digital, things get a bit more complicated. The moment you push the shutter release is not the same as the photo is taken. There are several sites concerned with synchronizing cameras to obtain the best possible stereo images, you might want to check pages.sbcglobal.net/rcrock/
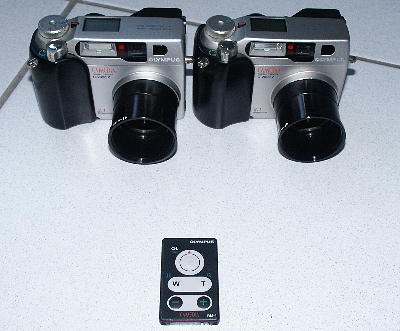
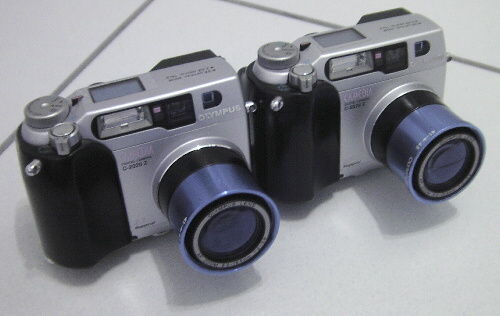
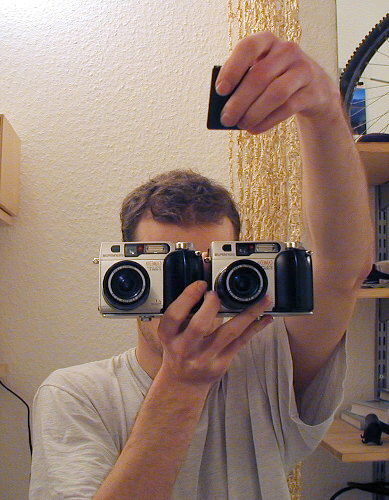
I took a slightly less sophisticated approach and purchased a second Olympus 2020 to complement my aging 2020. This way I now have an Olympus 202020: A stereo camera.
I am also thinking of directing the IR beam via optical fibres to the two IR receivers on the cameras. But so far, I have not found a cheap source of thick glass fibres. And to use these flimsy 0.5mm fibres does not seem to make sense to me...
So, now some pics showing my Olympus C-202020 Zoom, shot with my Olympus C-2040IR, hence the purple IR-effect on the Olympus lens barrels:

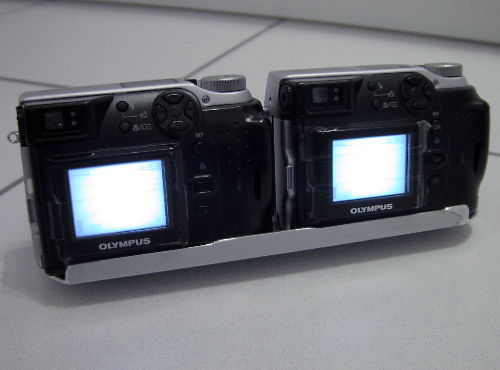
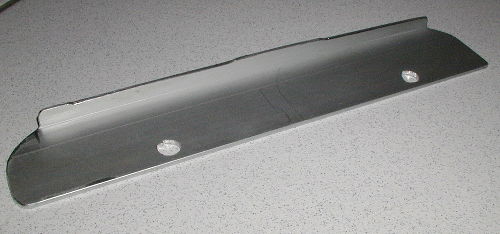
And here's how I hold the camera(s):
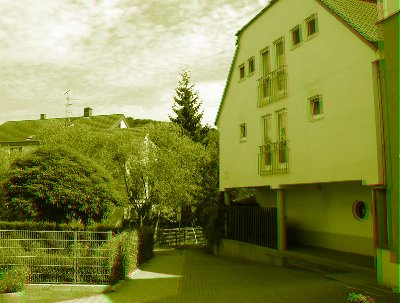
This was shot with my 202020 and the two images were overlaid in PaintShopPro, greyscaled and tinted.
This is for those of you preferring parallel vision:


And this is for those of you preferring crossed-eye vision: