Main: www.jr-worldwi.de/photo/
How to disassemble an Olympus 2040
Back to the Olympus C-x0y0 modding page
Be sure to read my modding disclaimer here before proceeding.
Well, before you start, buy yourself a tiny Philipps Head screw driver.
Remove the batteries and the SmartMedia card from the camera. Make sure you are not charged with static electricity. Touch a metal water tap for example or use one of those anti-static-cords that you put around your wrist. I suggest that you read Gary Honis' disassembly instruction before continuing with mine.
Every Camedia is slightly different. So if you have removed the screws and the camera still is not loose, search for other screws.
Special things for the 2040 in contrast to Gary's 2000:
- two screws in the smart media compartment
- battery compartment has to be open to disassemble the camera
The 2040 can be devided into four main parts:
- the top cover
- the front cover with the PC-sync flash connector
- the circuit boards with CCD and lens
- the rear cover with the LCD and control buttons
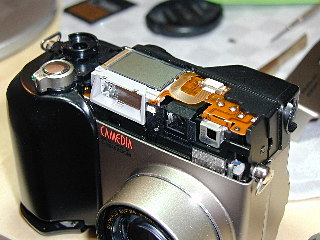
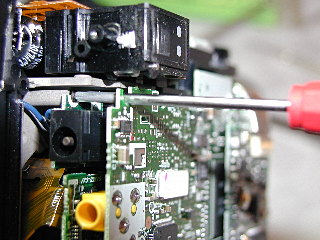
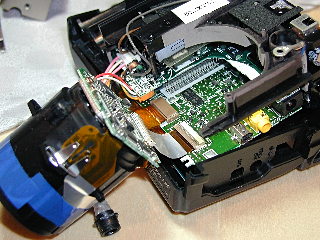
This is with the top cover removed. You have to remove it to gain deeper access.
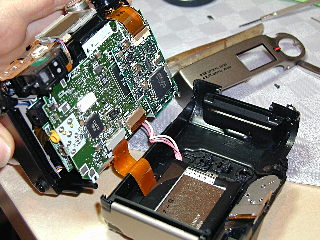
The rear cover is attached via various wires and cables to the circuit boards.
To be able to remove it as far as shown here, you have to loose (not lose!)
the small connector on the top circuit board:
However, you will probably not need that. For most operations the rear panel can stay in place.
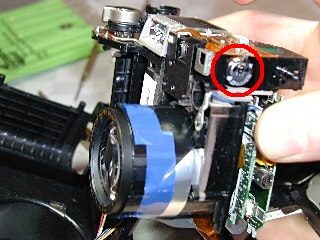
It will later on be very handy to have the front cover completely
separate from the rest. Use a flat but sharp screwdriver
to remove the circlip (the "horseshoe" shaped thingy) that holds the socket in place.
Here is what I meant with hidden screws...
...think twice if it necessary to put a hidden screw back in. If it falls into the camera,
you have to disassemble it again.
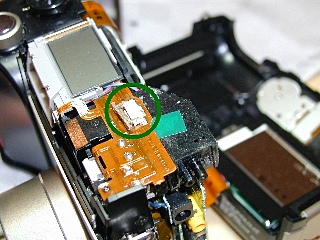
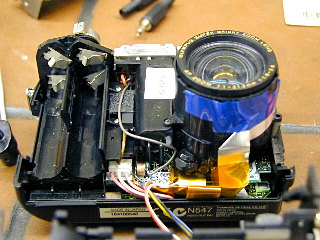
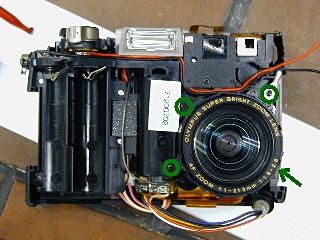
This shows a "naked 2040" without its covers.
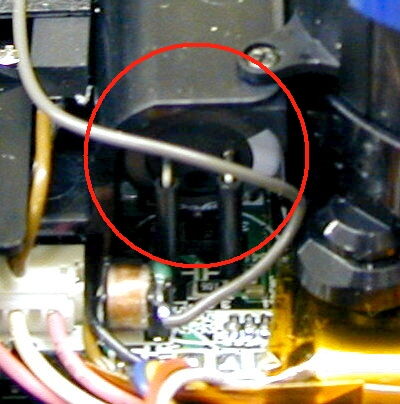
The thing in the red circle is a capacitor. These things store energy. They can be dangerous when you touch them.
This is the "small" memory capacitor which remembers the camera's settings for a few minutes while there is no battery inserted.
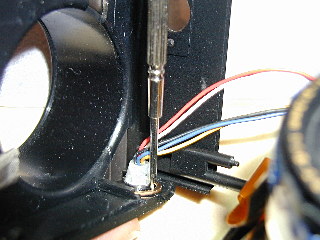
Next up is a view of the bottom of the 2040:
The center enlarged:
Do NEVER EVER touch anything concerned with the flash.
It has a large capacitor, a round thing about 15mm (0.6") in diamater, shown inside of the red circle.
It stores energy for the flash. It is noticeably larger than the memory capacitor and can severely hurt you.
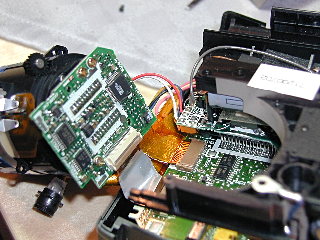
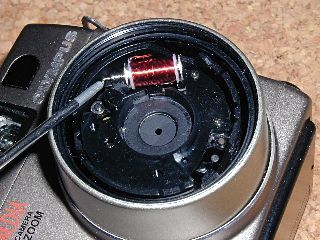
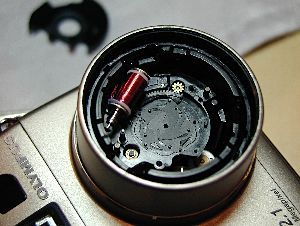
Extending the madness over for what Gary did, I also disassembled the lens and CCD part. It is easy. Just be careful.
Start with detaching the Lens/CCD-combo from the main circuit boards (four screws):
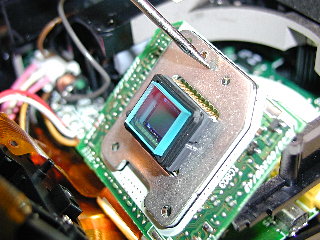
Now you can take out the CCD sensor board:
Now, you are ready to do the final step: Separate the CCD sensor from the lens.
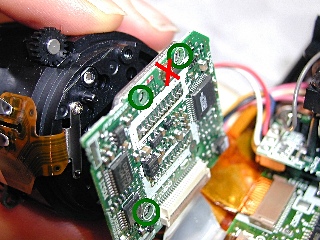
Do only remove the three "green" screws!!
You can see the CCD sensor on its board, with the IR blocking filter in front:
The aluminium(?) works as a heat conductor.
You should be able to pull the filter out with your fingers
or (better) a pair of plastic tweezers.
So, this is the IR blocking filter:
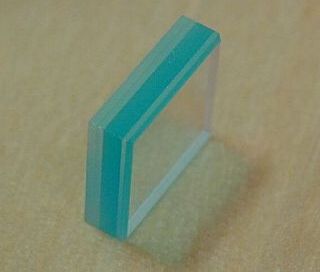
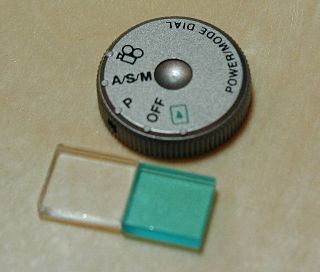
compared to a) the command dial and b) the replacement glass plate
Note the different layers of the blocking filter visible in the left shot!

Stay tuned when I show you how the lens looks from the inside!
As promised, the (partly) disassembly of the lens. Although the Olympus x040 has a faster lens than the x030, x000 and x020 versions, I suspect that the basic construction is fairly similar. If you can confirm or correct this, please contact me. However, I strongly suggest that you do not do this disassembly. It is normally pointless and possibly introduces dust to places where you do not want dust at all: the glass surfaces of your lens. Of course, if you think that either the aperture-, shutter-, zoom- or lens-extension mechanism is mechanically defect, you probably do not have another possibility (except sending the camera in to Olympus).
When I bought my broken 2040 on ebay I did know that its lens looked like this. The outer part of the lens (the one that tells the technical specifications) had been broken out of the lens assembly after a fall. I suspect that of the broken Olympus x0y0s found on ebay
- 75% died from falling
- 10% broke when the lens extended against some resistance, either a camera bag or the original lens cap
- 10% were soaked in water
- and probably less than 5% caused by faults by Olympus.
So, if you truely love your Olympus, you should invest in buying a metal lens collar like the Olympus CLA-1 or a similar third-party product. I might make the Olympus more bulky, but I consider it bullet-proof with this accessory. Many people, including Jeremy from dpwfiw rate the original adapter as being the most expensive and most stable. I do not know the adapters by other manufacturers, however the build quality of the Olympus adapter is first notch and it made my IR LED collar modification very easy as it is cylindrical and not conical.
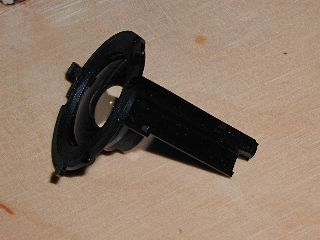
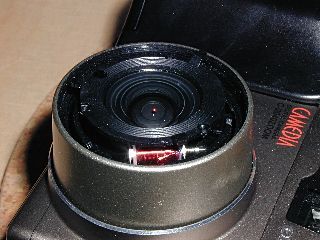
This is a moving part of the lens, it sits directly behind the front glass.
The three "noses" on its circumference help to guide it.
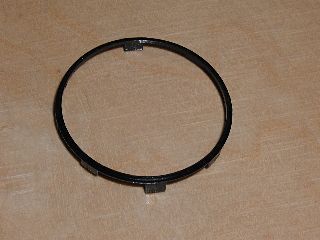
I presume that this is a guidance ring situated between the front lens part and the outer ring on the camera body.
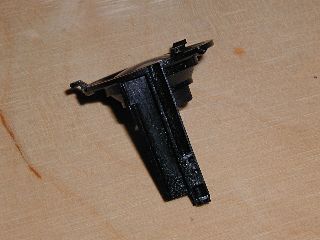
This is the view into the lens with the aforementioned parts removed. The red thing is a solenoid that drives the mechanical shutter over a linkage. The tip of the screw driver points to the silver moving part.
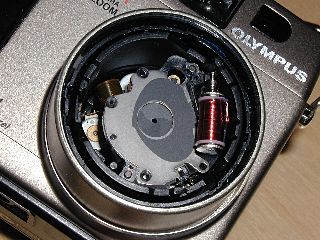
With the black plastic plate visible in the last picture removed, the shutter mechanism is visible. It consits of two greyish very thin metal "wings". It is shown in its "open" position. Underneath the shutter wings is a thin silver metal plate that separates the shutter mechanism from the aperture mechanism.
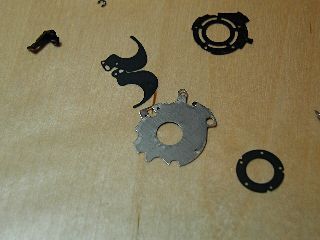
These are the parts of the mechanical shutter and the parts that separate it from the aperture mechanism.
I noticed that all the greyish metal parts have a pretty strange feel to them. I suspect that they are coated with a special layer (I suspect graphite or similar.) that reduces friction. Thinking about it, this makes sense as these parts glide on each other and the other parts shown here. I therefore suggest that you do not handle them with your fingers unless you have freshly washed them with a good soap. Any grease on the coating could prevent correct function as it is sticky.
I also disassembled the aperture mechanism (sorry, no picture). However, putting it back together is really difficult. You can see in the above picture how each of the "wings" is firstly attached on an inner ring and secondly on an outer ring. A small electric motor (you can see the pinion gear) turns the outer ring. The wings then do a slide/turn movement opening or closing the aperture.
Back to the Olympus C-x0y0 modding page
This section probably applies to the following cameras:
- Olympus C-2000 Zoom
- Olympus C-2020 Zoom
- Olympus C-2040 Zoom
- Olympus C-3000 Zoom
- Olympus C-3020 Zoom
- Olympus C-3030 Zoom
- Olympus C-3040 Zoom
- Olympus C-4000 Zoom
- Olympus C-4040 Zoom
copyright 2004..05 by jensroesner.de